
Configuring QoS with Cisco's Intent-Based Networking
Jan 09, 2018
Over the past few months, you might have noticed Cisco’s publicity push regarding intent-based networking. The first time I saw this new brand messaging was at the Las Vegas McCarran International Airport, when I arrived for Cisco Live 2017. Walking up and down the Vegas strip, there it was again, larger than life on the Cosmopolitan Hotel's sign.
Then, once attending Cisco Live, I repeatedly heard the message and the promise of intent-based networking. That’s the focus of this blog post: what is intent-based networking, and how can it make your life easier. Even though intent-based networking can ease the configuration of multiple features, to provide a tangible example, this blog post focuses on how it can be used for quality of service (QoS) configuration.
At a high level, intent-based networking is the idea that you can easily communicate to your network the behavior you wish to be carried out in the network, without the need to know the underlying command line commands required for the configuration. While I’m confident Cisco will continue to roll out more and more intent-based networking features, an early entry into the intent-based networking category is QoS.
Specifically, Cisco’s Application Policy Infrastructure Controller - Enterprise Module (APIC-EM) Software Defined Networking (SDN) controller has a feature called EasyQoS. Once the Discovery feature is used on the APIC-EM to discover a specific network topology, you can tell the EasyQoS application what applications in your network are considered “Business Relevant,” “Default,” and “Business Irrelevant.” After all, despite its powerful configuration features, EasyQoS is not clairvoyant enough to know what applications you consider to be important to your business. Then, EasyQoS uses the application classification information you’ve provided and deploys a very robust QoS configuration out to as many as 1000 Cisco network devices (e.g. routers and switches). The interesting thing is, these routers and switches could be different models, which use different commands to accomplish similar tasks, and EasyQoS will send out appropriate sets of commands to each device.
Let’s check out the process of configuring multiple network devices using EasyQoS.
Step #1: Define a Scope
A scope is a collection of one or more discovered, network infrastructure devices. Consider the figure below. You could drag multiple discovered routers and/or switches, displayed under Network Devices, and drop them under Scopes. Later, you’ll be able to apply a QoS policy to a configured scope.

Step #2: (Optional) Modify the Application Registry
As seen in the following figure, Cisco’s EasyQoS already has a fairly thorough database of applications, categorized into major categories (e.g. Control) and subcategories (e.g. Network Control and Signaling).

Step #3: (Optional) Reclassify Applications
Cisco EasyQoS makes several reasonable assumptions about which applications fall under the “Business Relevant,” “Default,” and “Business Irrelevant” traffic classes. However, you can drag and drop specific applications form one traffic class to another. For example, in the figure below, the “bittorrent” traffic class is being reclassified from the “Business Irrelevant” traffic class to the “Business Relevant” traffic class. Also, notice it's on this same configuration screen where you specific the name of the policy you’re defining.

Then, if you’re happy with the policy, you can click the Apply Policy button, to cause the APIC-EM controller to send out device-specific configuration commands to all devices in a specific scope. You can choose for the policy to be applied immediately, or, as seen in the figure below, you can schedule a time to push out the QoS configuration commands.

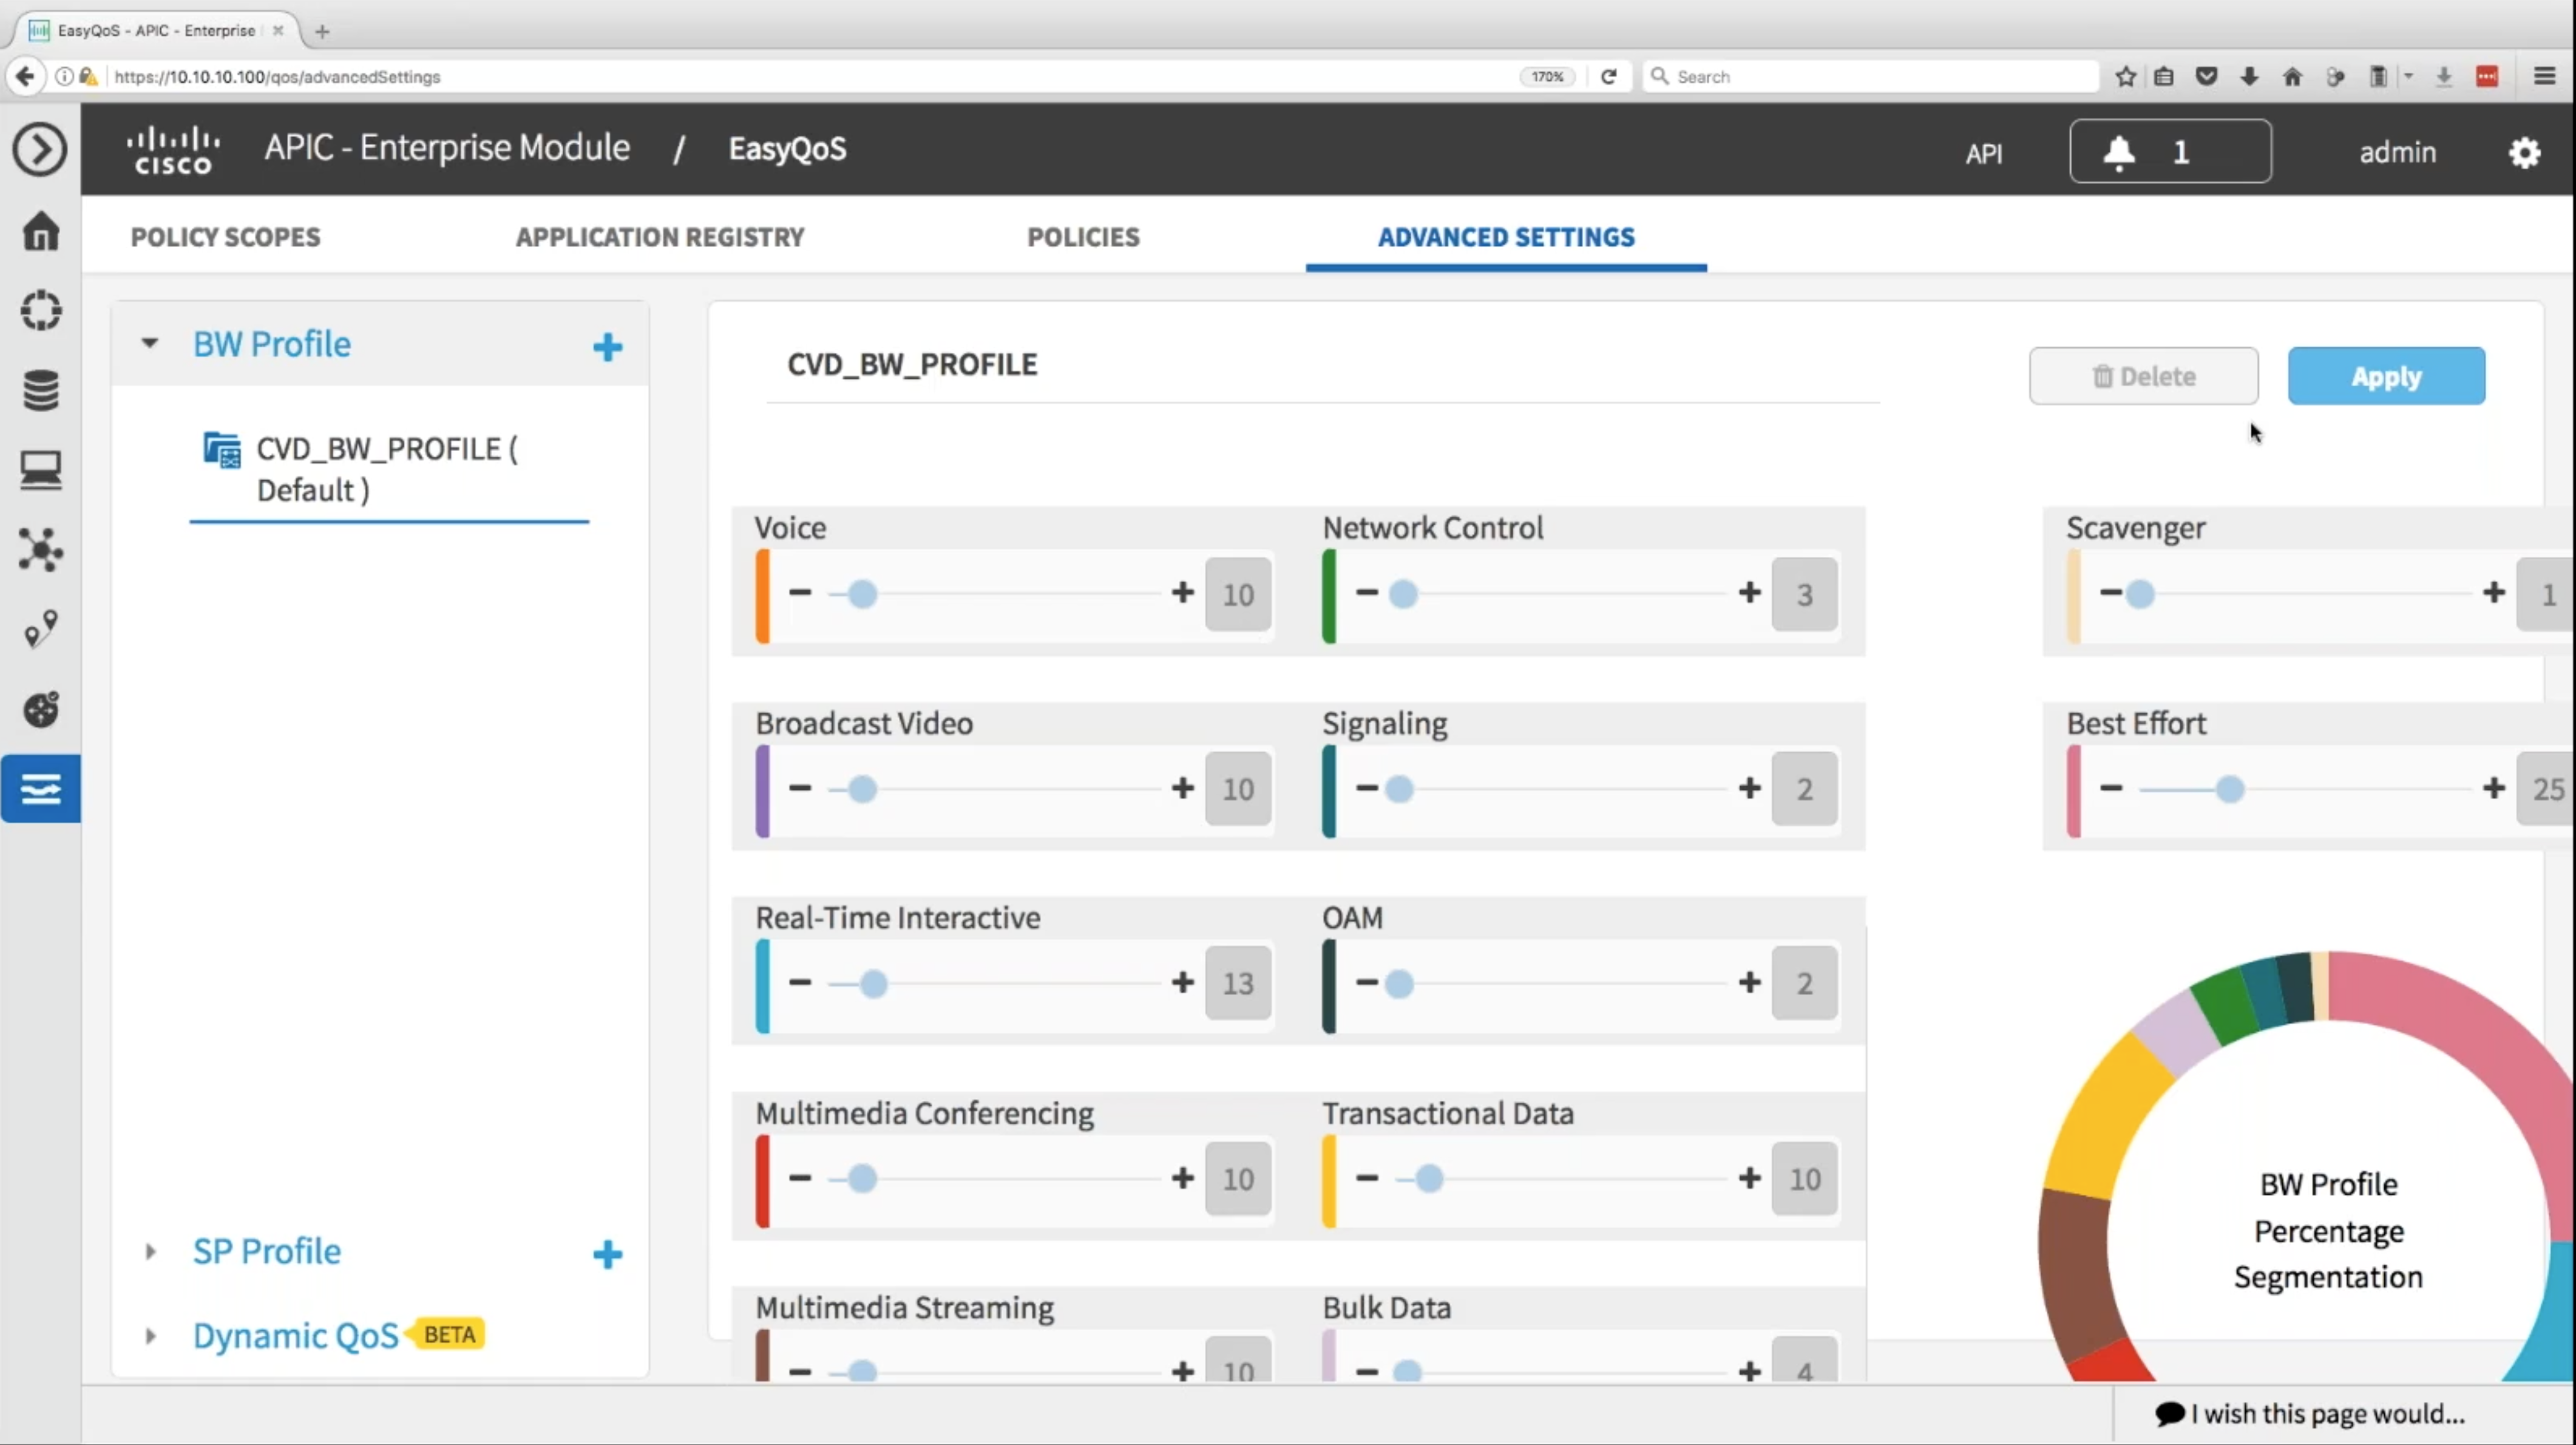
Step #4: (Optional) Adjust Default Bandwidth Settings
Again, Cisco EasyQoS makes a set of reasonable assumptions about how much bandwidth to allocate to various traffic categories, as shown below. However, you can adjust those default bandwidth allocations, by simply dragging the corresponding slider bars.
Getting Started
If you want to “get your hands dirty” with Cisco’s APIC-EM, and take the EasyQoS feature for a spin, you’ve got a couple of options.
Option #1: Cisco’s DevNet Sandbox
Cisco’s DevNet Sandbox allows you to get free access to APIC-EMs. For more information, click HERE.
Option #2: Local Install
Cisco allows you to download and install the APIC-EM controller for free. No license is required. For more information, click HERE.
For FREE training on the fundamentals of SDN, check out my SDN Mini-Course. Click HERE to register.

Kevin Wallace, CCIEx2 (R/S and Collaboration) #7945

